
The Importance of a Proper Window Install: Your Ottawa Home's Best Defense
Introduction: The Importance of a Proper Window Install
Even the most energy-efficient, high-quality window in the world will fail to perform optimally if it isn't installed correctly. Poor installation can lead to a myriad of problems, including drafts, water leaks, compromised insulation, and even voided manufacturer warranties. In a climate like Ottawa's, with its harsh winters and varying seasonal conditions, these installation mistakes can be particularly costly, leading to significant discomfort, increased energy bills, and potential damage to your home's structure.
Imagine a winter storm in Ottawa: if your windows aren't properly sealed and insulated, cold air can seep in, chilling your home and forcing your heating system to work overtime. Conversely, in the humid summer, improper installation can lead to moisture intrusion and condensation issues. A bad install might let in water that freezes and causes damage to your walls or foundation over time. This guide will walk you through the critical aspects of window installation, explaining the different methods and emphasizing why professional expertise is paramount to ensuring your windows perform as they should.
Full-Frame vs. Retrofit (Insert) Installation: Which is Right for Your Home?
When it comes to window replacement, there are two primary installation methods: full-frame and retrofit (also known as insert or pocket installation). Understanding the differences between these two approaches is crucial for making an informed decision that best suits your home’s needs, your budget, and your long-term goals.
Full-Frame Installation: A Fresh Start
A full-frame installation involves removing the entire existing window unit, including the old frame, trim, and sashes, right down to the rough opening in the wall. This method allows the installers to inspect the original sub-structure for any hidden issues like rot, water damage, or insulation gaps. It’s a comprehensive approach that essentially provides a “fresh start” for your new window.
When to Use Full-Frame Installation:
•Deteriorated Frames: If your existing window frames are rotted, warped, or otherwise damaged, a full-frame replacement is necessary.
•Changing Window Size or Style: This method allows you to alter the size or style of your windows, as you are not constrained by the old frame.
•Maximizing Glass Area: Full-frame installation can often result in a larger visible glass area, as modern window frames are often narrower than older ones.
•Very Old Windows: For older homes, a full-frame replacement is highly recommended to ensure there are no hidden structural problems that could compromise the new window’s performance.
Pros of Full-Frame Installation:
•Complete Waterproofing and Insulation: By exposing the rough opening, installers can apply new flashing, insulation, and air/vapor barriers, ensuring a superior, weathertight seal.
•Addresses Structural Issues: This method allows for the inspection and repair of any underlying rot, water damage, or structural problems in the wall framing.
•Superior Energy Efficiency: With all-new components and a complete perimeter seal, full-frame installations offer the highest level of energy efficiency.
•Greater Long-Term Durability: By addressing any hidden issues and providing a completely new, properly sealed unit, full-frame replacements offer greater long-term durability and performance.
Cons of Full-Frame Installation:
•Higher Cost: Full-frame installations are more labor-intensive and require more materials, making them roughly 10-20% more expensive than insert installations [1].
•More Disruptive: This method involves more interior and exterior finishing work, which may include replacing interior casing trim, patching drywall, and touching up paint.
Retrofit (Insert) Installation: A Practical Upgrade
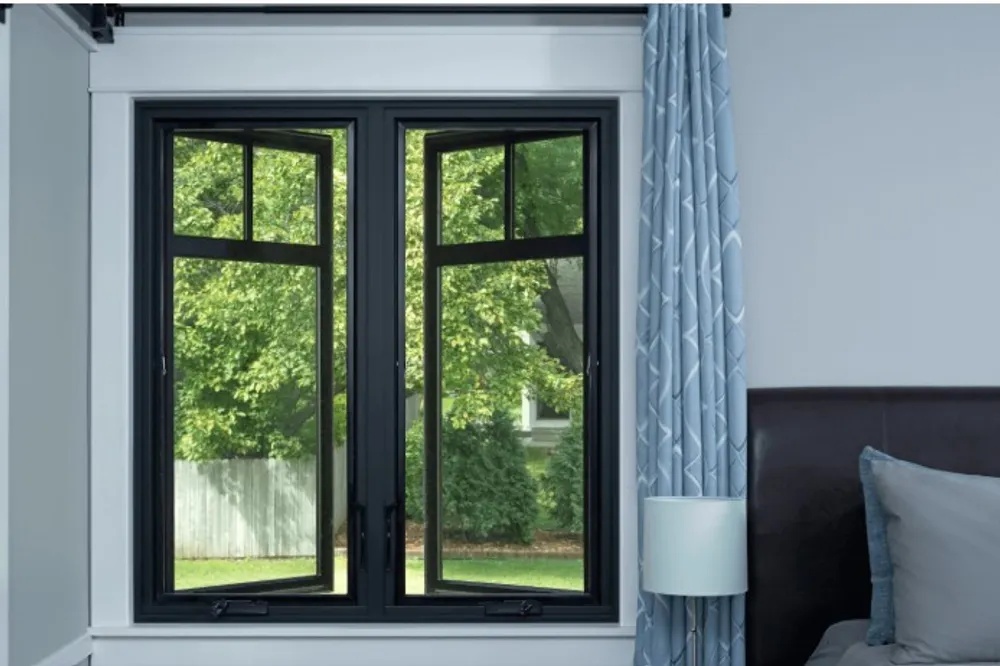
A retrofit, or insert, installation involves fitting a new window into the existing window frame. The old window sashes and hardware are removed, but the original frame and trim remain in place. The new window, which has its own smaller frame, is then inserted into the old opening.
When to Use Retrofit Installation:
•Good Condition Frames: This method is suitable when the existing window frames are in good structural condition, with no signs of rot or water damage.
•Budget-Conscious Projects: Retrofit installations are a good option for homeowners on a tighter budget who still want to upgrade their windows’ energy efficiency and functionality.
•Minimizing Disruption: If you want to avoid disturbing your home’s interior or exterior finishes, a retrofit installation is a less invasive option.
Pros of Retrofit Installation:
•Faster and Cheaper: With less labor and fewer materials required, retrofit installations are typically faster and more affordable than full-frame replacements.
•Minimal Disruption: This method often requires no changes to the existing trim, siding, or drywall, making it a cleaner and less disruptive process.
•Improved Energy Efficiency: While not as comprehensive as a full-frame replacement, a retrofit installation can still significantly improve your home’s energy efficiency by upgrading to a modern, better-insulated window unit.
Cons of Retrofit Installation:
•Hidden Problems Remain: Since the old frame is left in place, any hidden rot, water damage, or insulation issues within the frame will not be addressed.
•Reduced Viewing Area: Because the new window is installed within the old frame, there is essentially a “frame within a frame,” which can result in a slightly smaller glass area and less natural light.
•Inherits Imperfections: If the old frame is not perfectly square or has shifted over time, the new insert window will inherit these imperfections, which could affect its operation and seal.
Comparison Note: A Tale of Two Approaches
Think of it this way: a full-frame installation is like rebuilding the entire window cavity from scratch—it provides the best possible outcome but requires more work and investment. An insert installation is like giving your window a “new engine” without changing the body—it’s faster and more cost-effective, but it won’t fix any underlying “rust” or structural issues. As one source aptly puts it, full-frame replacement yields greater long-term durability and energy performance, whereas inserts are about convenience and cost savings when appropriate
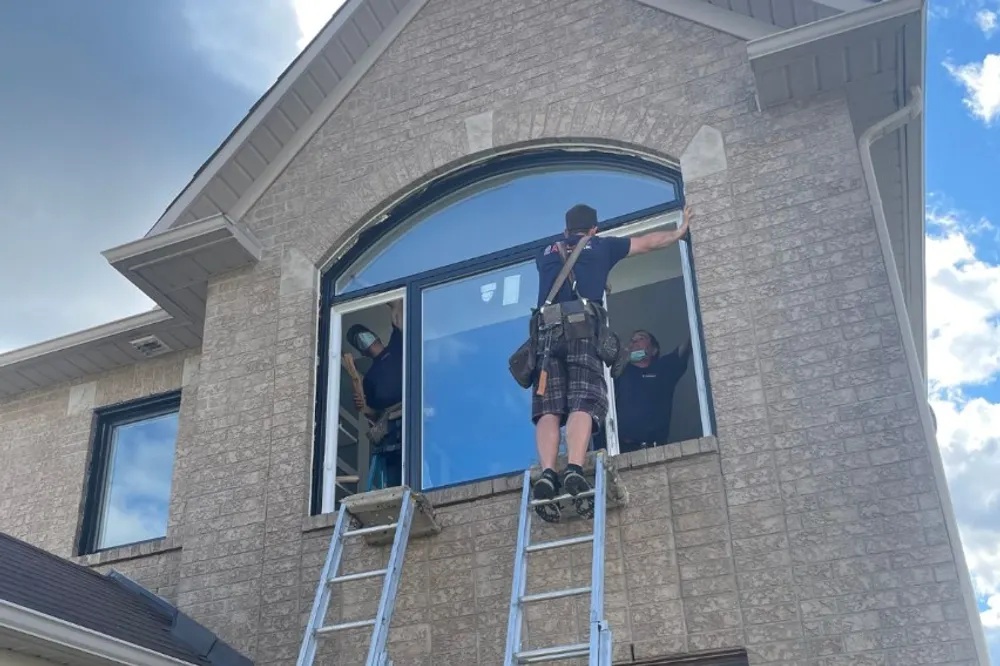
Step-by-Step: How a Professional Installs a Window (Full-Frame)
Understanding the meticulous process of a full-frame window installation can help homeowners appreciate the complexity and precision involved. This detailed approach ensures optimal performance and longevity for your new windows. Here’s a step-by-step breakdown of how a professional team, like Advanced View, handles a full-frame replacement:
1. Preparation: Protecting Your Home
Before any removal begins, the installation team will meticulously prepare the work area. This involves:
•Room Preparation: Laying down drop cloths to protect your flooring and furniture from dust and debris. Curtains, blinds, and any wall hangings near the windows will be carefully removed.
•Minimizing Heat Loss (Especially in Ottawa Winters): In Ottawa’s cold climate, professional installers employ strategies to minimize heat loss. They will typically work on one window at a time, and in very cold conditions, they may even close off rooms or use temporary barriers to contain the cold air and maintain your home’s comfort.
2. Remove Interior Trim: Exposing the Old Window
The interior casing trim around the old window will be carefully removed. In some cases, a portion of the exterior cladding might also need to be removed to expose the nailing fins or attachment points of the old window. This step is crucial for gaining full access to the existing window unit and its frame.
3. Remove Old Window: Clearing the Opening
For a full-frame replacement, the entire old window unit, including its frame, is carefully pried out. This process involves unscrewing or cutting any nails or fasteners that secure the old frame to the rough opening. Once removed, you are left with a clear, rough opening in the wall, ready for the new window.
4. Inspect & Repair Opening: The Critical Step
This is arguably the most vital stage of a full-frame installation. With the rough opening exposed, the installer can thoroughly inspect the underlying wood studs and sill for any signs of water damage, rot, mold, or pest infestation. It’s not uncommon to discover hidden issues that were previously concealed by the old window frame. For example, a homeowner might only discover significant rot in the sill area after a full-frame removal, which can then be properly addressed and repaired [3].
During this phase, the installer will:
•Repair or Reinforce: Any rotten or damaged wood will be replaced, and the opening will be reinforced as needed to ensure a stable and secure foundation for the new window.
•Install New Sill Pan or Flashing Tape: To prevent future water intrusion, a new sill pan or flashing tape will be installed at the base of the opening. This creates a critical waterproof barrier, directing any moisture away from the wall structure.
5. Insert New Window & Level: Precision is Key
The new window, complete with its frame, is carefully placed into the prepared rough opening. This step requires meticulous attention to detail to ensure the window is perfectly aligned. Installers use shims—small pieces of wood or plastic—to adjust the window until it is perfectly level, plumb (vertically straight), and square. This precision is critical for the window’s proper operation, energy efficiency, and long-term performance. They will also check that the margins around the window are even and that the window opens and closes smoothly.
6. Secure Window: Anchoring for Stability
Once the new window is perfectly positioned and leveled, it is securely fastened to the rough opening. This is typically done by screwing through the sides of the new window frame or, for newer windows, through nailing fins located around the perimeter of the frame. For full-frame replacements with nailing fins, exterior flashing tape is applied over the fins. This tape creates a continuous, waterproof seal between the window frame and the home’s exterior, protecting against water intrusion.
7. Insulate Gaps: Sealing Against Drafts
The gap between the new window frame and the rough opening is a potential source of drafts and energy loss. To prevent this, professional installers fill this gap with a low-expansion foam insulation specifically designed for windows and doors. This foam expands gently, creating an airtight seal without warping the window frame. In some cases, fiberglass insulation may also be used, but foam is generally preferred for its superior air-sealing properties.
8. Install Trim and Finish: The Finishing Touches
After the window is secured and insulated, the interior and exterior trim are installed or reattached. For full-frame replacements, new interior trim is often provided, as the dimensions might differ from the old window. Caulk is applied along the edges of the trim, both inside and out, to ensure an airtight seal and a clean, finished look. On the exterior, aluminum capping may be installed around the window frame to cover any old paint lines and provide a durable, weather-resistant finish, also sealed with caulk.
9. Final Checks: Ensuring Perfection
The installation process concludes with a thorough final inspection. The installer will:
•Test Operation: Verify that the window opens, closes, and locks smoothly and correctly.
•Clean Glass: Clean the glass panes to remove any smudges or debris from the installation process.
•Verify Components: Ensure all sashes, screens, and hardware are properly in place and functioning.
•Cleanup: Thoroughly clean up all debris, old materials, and packaging from the work area.
•Walkthrough: Conduct a walkthrough with the homeowner, explaining the operation of the new windows, providing maintenance tips, and reviewing warranty information.
This meticulous, step-by-step approach to full-frame window installation ensures that your new windows are not only aesthetically pleasing but also perform optimally in terms of energy efficiency, security, and durability, providing lasting comfort for your Ottawa home.
Special Considerations in Ottawa: Adapting to Our Unique Climate
Ottawa’s distinct climate—characterized by extreme temperature fluctuations, heavy snowfall, and occasional high winds—presents unique challenges and considerations for window installation. Professional installers in the region are well-versed in adapting their techniques and material choices to ensure optimal performance in these conditions.
•Enhanced Insulation and Sealing: Installers in Ottawa often use extra insulation or thicker caulk beads to create a more robust thermal barrier against the cold. They understand the importance of meticulous sealing to prevent drafts and moisture intrusion, which can lead to significant energy loss and potential damage in freezing temperatures.
•Addressing Older Home Imperfections: Many homes in Ottawa are older and may have settled over decades, leading to walls that are not perfectly square or plumb. A skilled installer will carefully shim and may need to plane or adjust the rough opening slightly to ensure the new window fits perfectly and operates smoothly, even in imperfect conditions.
•Vapor Barrier Tie-Ins: In full-frame installations, especially in older homes, professionals will pay close attention to reconnecting to the home’s interior vapor barrier or using specialized foam that effectively air-seals. This is crucial to prevent condensation within wall cavities, which can lead to mold growth and structural damage over time. This level of detail is often missed in DIY installations.
•Winter Installation Feasibility: A common concern for homeowners is whether windows can be installed during Ottawa’s cold winters. The answer is a resounding yes. Reputable professionals use specialized low-temperature foams and sealants that cure effectively in cold weather. They also employ techniques like working on one window at a time and sealing off rooms to minimize heat loss, ensuring your home remains comfortable throughout the process. Don’t let the season deter you from scheduling a necessary upgrade if you’re working with experienced installers.
DIY or Not? The Case for Professional Window Installation
Many homeowners are keen on tackling home improvement projects themselves, but when it comes to window replacement, the question of “DIY or Not?” leans heavily towards professional installation. Unlike painting a room or assembling furniture, window installation is a complex task that requires specialized skills, tools, and knowledge. It’s not just about putting a new window in an opening; it’s about ensuring proper sealing, insulation, and structural integrity.
•Complexity and Skill: Replacing a window requires carpentry skills, glazing knowledge, and often two people for safety, as windows can be heavy and fragile. Professionals are trained in precise measurements, proper leveling, and secure fastening techniques that are critical for optimal performance.
•Risk of Costly Mistakes: Mistakes during installation can lead to significant and expensive problems down the line. Improper sealing can result in water leaks, leading to hidden rot, mold growth, and structural damage within your walls. Poor insulation can cause drafts, higher energy bills, and uncomfortable living spaces. It’s often said that 90% of window issues that arise years after installation stem from installation errors, not from the window itself. This underscores why using experts is highly recommended.
•Warranty Protection: A crucial, often overlooked, aspect of DIY installation is the impact on your window’s warranty. Many manufacturers explicitly state that their “lifetime warranty” or product guarantees are void if the installation was not performed according to their guidelines or by a qualified, certified professional. Hiring certified installers ensures that your warranty remains intact, protecting your investment for years to come.
•Time and Effort Savings: While DIY might seem like a cost-saving measure upfront, it can quickly become a time-consuming and frustrating endeavor for those without experience. Professionals can complete installations efficiently and correctly, saving you valuable time and the potential headaches of troubleshooting unforeseen issues.
•Safety Concerns: Handling large, heavy glass units and working with power tools can pose significant safety risks. Professional installers are equipped with the right safety gear and follow strict protocols to ensure a safe working environment.
While a handy person might be able to manage a small, low-risk project like replacing a window in a shed, for your home’s primary windows, it is almost always best to hire professionals. The peace of mind, long-term performance, and avoidance of costly future repairs far outweigh the perceived savings of a DIY approach. Ultimately, entrusting your window installation to experts will save you time, money (by avoiding damage or inefficiency), and ensure your windows perform optimally.
Conclusion: Quality Windows + Expert Installation = A Problem-Free Home
A proper window installation is a blend of art and science, demanding precision, the right materials, and extensive experience. When executed correctly, your new windows will be airtight, weatherproof, and beautiful, providing comfort and efficiency for decades to come. Taking the time to choose both the right installation method and, crucially, the right installer, is an investment that pays dividends.
By entrusting your window project to experienced professionals, you ensure that your investment in new windows delivers maximum performance. Advanced View’s installation team, for example, prides itself on meticulous attention to every detail, from preparation to final checks. This commitment ensures that Ottawa homeowners can enjoy the full benefits of their window upgrades without worry—a home that’s cozier, more efficient, and problem-free.
Contact Us Now!
Give us a call or send us a message using the form.
About Our Company
Advanced View Windows and Doors Inc. has been providing customers in and around the Ottawa, ON area with top-quality window and door products and installations since 1981. We take a unique approach to each and every job, offering a wealth of combined experience to help lead you in the right direction no matter how large or small your project happens to be.
"Your trusted Ottawa windows and doors provider — 40+ years of excellence.”
Great for reinforcing location and expertise throughout.
Phone: (613) 727-8174
Monday - Friday: 7:00am - 6:00pm
Saturday: 8:00am - 5:00pm
Sunday: Closed